If you love contemporary quilting, be sure to check out Quilting Arts blogs. It's packed with great inspiration and ideas. (Sign up for their newsletter, too!)
The most recent article discusses design ideas to help you improve your art. Frankly, I'm blown away by the "Trees" quilt by Lyric Kinard. It's just beautiful. Makes me want to get out my supplies right now!
Enjoy!
Showing posts with label contemporary quilts. Show all posts
Showing posts with label contemporary quilts. Show all posts
Tuesday, September 7, 2010


Thursday, July 30, 2009
Jay McCarroll Update...

Saturday, March 7, 2009
Urban Couture quilt


 I finally finished (well, not finally, it didn't really take me that long) a quilt using the Urban Couture jelly rolls I picked up at Beverly's. These are designed by BasicGrey and is produced by Moda. I also used a brown and red Fairy Frost prints (Michael Miller) as accent fabrics and backing. In addition, I used a solid lavender dupioni silk, which I pleated in two strips as a dimensional accent, and a gold cotton/silk blend (I believe by Robert Kaufmann) for the outer border. I used brown Moda bias binding (which I actually buy by the roll now) to complete the quilt.
The pattern is my own. Basically, I assembled the Jelly Roll into strips of five strata, and then cut them into large right triangles. I then sewed those into squares, using Fairy Frost and an extra BasicGrey brown print, and arranged them as I desired.
For quilting, I did straight-line quilting on top of the BasicGrey patterns. Then, I did free-motion quilting throughout all the brown areas, to make the dark areas recede. After adding the binding, I also added some iridescent beads to the centers of each large flower in the brown floral print for added dimension. (I think I'd skip this part, also--too labor intensive, and it doesn't add much to the overall look of the quilt.)
The quilt is about 70" square, finished. If I were to make this pattern again, I think I'd only sew strips of three to four strips together when making the strata, so the squares didn't end up quite so large. I really love the shine silk gives to quilts, though the dupioni frays like crazy. It helped that I used my serger on the edges.
Friday, February 6, 2009
Jay McCarroll's new quilting fabrics by FreeSpirit!
I was browsing through this month's Quilting Arts magazine--my all time favorite quilting magazine--and discovered that Jay McCarroll (check out his cool online store!), the winner of season one from Project Runway (a Bravo TV show that I adore) has officially entered the world of quilting with his own quilting fabrics. I love them!
So far, he is showcasing two lines:
- Garden Friends: This cheerful and quirky line of bunnies and birds offers a rainbow of prints that zigzag through our spring garden of goodies.
- Woodland Wonderland: Another quirky line (that would probably coordinate well with the above line) offers a woody alternative of grays, orange, teal, lime pink and blue, with deer wandering through a forest. The mushroom print is my favorite!
Tuesday, June 17, 2008
Dawn's quilt


 This is a quilt I started a long time ago and did not like. I didn't use a pattern (imagine the quilt without any purple batik strips on it--so no purple or borders at all), so it wasn't planned very well. I put it in my closet and forgot about it.
My son's physical therapist was planning to move on to another job, so I wanted to make her a quilt (her name is Dawn), so I thought I could fix this one. I used a Ricky Tim's style convergence quilt technique to redesign it, cutting the quilt top into horizontal strips and then inserting purple batik strips. That pulled the whole design together, making the top look like a window, especially after adding matching borders.
I also added a thin pink batik border and a thicker mottled batik border on the outside. For the back, I used a gorgeous purple fabric by Robert Kaufman. (I used the same print on my emerald ocean quilt, only in green, not purple.) I embroidered a label with leftover fabric and appliqued it to the back before assembling the quilt.
I also used acrylic paint by Jacquard (Lumiere) and Pearl-Ex powder to stamp Jake's foot prints next to the label, so Dawn will remember the hard work she did helping him to walk. Jake did not like getting paint on his foot, or even taking his socks off to do the prints, which is why the first foot print came out better than the second.
For quilting, I used variegated Mettler cotton thread, which surprisingly kept breaking. I eventually switched to another spool, and I must have been using a faulty lot. I did free motion stippling in the window pane areas of the quilt and in the ditch around the borders.
I rounded the corners, since I had barely enough bias binding, and that saves yardage. I applied it with my machine and a decorative stitch. Dawn absolutely loved it, and cried when I gave it to her. Jake actually started walking two weeks before she left, which was such a blessing. If you are reading this, Dawn, thanks for everything, and hope you had a great trip!
Friday, May 30, 2008
Stains on a quilt


 I have always told the recipients of my quilts that I don't see them as works of arts or as particularly special--so if they get spilled on or ruined, I won't be asking about them later on. Well, that may not be the case for the quilts I keep. The attached are a few photos of my second quilt, a crazy quilt I made with an Alexander Henry focus fabric.
I think one of my kids left a marker or an uncapped pen out and open on this quilt recently, and it bled (in dark blue ink) in two places. So sad! The splotches blend in pretty well--one is in the upper left corner of the first inner border, and the second is in the very outer left block.
But I thought I'd post a few images of this quilt just the same. In case you've wondered whatever to do with all those cool decorative stitches your sewing machine came with, crazy patchwork is easy and fun. And it doesn't have to look Victorian when you're finished, depending on the colors and fabric.
Friday, May 9, 2008
Optical Illusion quilt
 Inspired by an optical illusion book belonging to (and challenge by) my son, I designed the following pattern and quilt. I haven't used many batik fabrics before, so I thought I'd try my hand at these. Feel free to download my pattern and try it yourself. Let me know if you make one. I think mine came out pretty cool.
Keep in mind your dark and light fabrics have two have good contrast and they need to read as solid, or your quilt will blend. Your quilt will probably turn out pretty cool if it blends, but it won't have the same illusion quality.
Now, the construction is fairly straightforward, but I'm not the best at butting seams. So I used a cheater method and some Quilt-Fuse, which is used for watercolor and grid quilting. I pieced the entire quilt in an afternoon. See a product review here. It's a great shortcut, and it works like this:
- Cut your squares (in my case, squares and rectangles) to size.
- Line them up, right sides up (pin them in place if desired) on the Quilt-Fuse background (Quilt-Fuse is fusible lightweight interfacing with a printed grid, so it's easy to line up the rows).
- Fuse in place with an iron.
- Fold the fused quilt over on itself (with the interfacing on the outside, right sides together), and sew each horizontal seam. Be careful to keep an even seam allowance, using your 1/4" seam guide. Don't press yet.
- Clip your seams at the intersection of the grids before making the vertical seams. This will allow you to to butt the seam allowances, alternating one allowance up and one down, at each intersection.
- Now sew the vertical seams, maintaining the same 1/4" inch allowance, and being careful at each intersection that the seam allowances are butting as planned, as it goes under the presser foot (the top and bottom allowances should be going in opposite directions).
- Finally, press the entire quilt.
I added thin dark, medium and light borders, and then one larger medium border, and rounded the corners. I've never done this before--I used a rotary cutter and dinner plate, and pre-done binding by Moda (so easy it feels like cheating!).
It was also hard to figure out how to quilt this thing, without blending it too much. So I found some Sulky variegated thread and quilted a straight starburst pattern off-center throughout. You can see the center in the large, lower, left, light square. (And you get extra points if you can say that out loud.)


Saturday, March 8, 2008
Sayuri quilt
 Here is another quilt I finished a few days ago. It's called Sayuri, after the main character in Memoirs of a Geisha. It's for my sister-in-law, and I started it on Sunday of last week, discovering I only had a week to finish it. It's about 65"x 80".
I didn't use a pattern for this quilt. I picked up these four great prints from Joann's in the beginning of the year. All four of these are by Alexander Henry, and you can see some of them online, but I will list the three large scale prints here as well:
- Koto (in blue)
- Dancing Cranes (black)
- Lady Yang (black)
 I had originally intended to make a kimono quilt, but since I only had a week, I decided on a more simple design.
I used about 1.5 yard lengths of the large three patterns, cutting the blue center panel the widest, and then the other two more narrow. I added the small gold star print as borders, which really helps blend the overall look of this quilt. Since the scale is so large, it was hard to decide how big to make the blocks, but it seems to work well.
For the back, I found a cute print by Michael Miller with a black background printed with large wheelbarrows filled with flowers. I think the print is discontinued, but you can find tons of Asian inspired prints on the Michael Miller website. I used an 80/20 cotton/synthetic batting, which is light and fluffy.
 When it came to quilting, I was surprisingly at a loss. I quilted in the ditch along all the borders to keep the large quilt together. Then, I quilted loops on the crane fabric--using black thread, only in the background, blends in well and emphasizes the cranes just a little. I used a light blue thread in the background of the center panels, and red thread in the bamboo rushes as well. Then, I loaded up my machine with fuchsia silk thread, and set my machine on the eyelet program. I sewed an eyelet in the center of every flower in the floral and center panels.
I bound the quilt by machine with Moda bias binding (I love that stuff) in burgundy. Then, to finish the quilt and add flair, I sewed Swarovski crystals into the large flower centers with invisible thread. It adds just a touch of sparkle to a pretty quilt, and it emphasizes the metallic gold on the prints.
Finished Mocca & Kleo
 I finally finished the Alexander Henry quilt. It took forever to quilt the thing (even by machine). Next time, I won't do each block individually. It measures about 52"x 70".
The design was very easy to complete--just cutting rectangles and assembling them in a chevron shape. I used fleece for the backing, and no batting. I don't think I'll use cheap fleece again--at least not on a quilt this densely quilted. It turned out a little stiff for my taste--I think the fleece gets scrunched together in the quilting process. I've used it before, with terrific results, but it must depend on how densely you quilt.

 I used a Sashiko design from my embroidery machine to embroider the flowers around the border of the quilt. This was a time consuming process, as well, since the maximum area I can embroider is 6x10. I only could do two flower designs at a time.
Then, I used variegated red, black and yellow thread, and also plain white, to free-motion quilt in each block. I did the same quilting design in each fabric, and some came out better than others. But it's done, and it's a perfect size for building forts!
Sunday, February 10, 2008
Beautiful Batiks

My husband has two baby showers at work this week, and asked if I might consider whipping up a couple of baby boy quilts for his coworkers. Of course, I tend to collect girly fabric, so I searched through my entire stash to find something that would work for a baby boy. I have decided it's probably worth my while to make up several baby boy and baby girl quilts in advance for just such an occasion, since I tend not to work as well under stress.
I was able to find a fun strip set in my stash, however, and I I loved working with them. (I did get the first top finished today!) I didn't use the pattern, so I will upload a picture of my finished project later. You can find this great kit at Cozy Quilt Shop.
Monday, January 28, 2008
Emerald Oceans - my first art quilt
 Here are some photos of a quilt I just finished (after getting my machine back from the shop). I'm still working on the binding, and it's the first time I've bound a quilt using anything but my machine. I've used only two fabrics for the top: a brown marble Moda fabric for the border, and feathered print by Robert Kaufman. I saw the green print at my local quilt shop and fell in love. On the bolt, it starts with the lightest shade of celadon and fades to a deep forest green.
I didn't use a pattern, but imitated a borgello style of quilt. If you're not familiar with these, I suggest you check out this book by Marge Edie. They are very fun and easy to do.
 I used a soft 100% cotton batting with low loft, and a fun modern print by Michael Miller for the backing. For the quilting, I wanted to try my hand at a few free-motion styles. I used five different colors of thread, including silk and variegated thread. My machine is happiest with Mettler silk finish 100% cotton, but I was also able to use the silk thread without incident.


It only took a day to assemble the quilt top. The technique I used follows:
- I used about 1.5 yards of the green printed fabric, and started slicing in strips. I cut an equal number of 3", 2.5" and 2" strips for this quilt.
- Next, I sewed each strip into a loop, end to end, so the lightest part of the print met the darkest part (I pressed toward the darkest end).
- Then, I arranged the loops on the floor, and straightened the seams out to make a horizon.
- After I was pleased with the arrangement (I used alternating widths of loops for interest), I cut each of the loops open at the top, and straightened them out.
- After numbering the strips carefully with chalk, I sewed them together. For some reason, my strip-style quilts tend to warp slightly upon assembly. To fix this, I alternate the sewing direction (that is, sewing from top to bottom and from the bottom to top) when assembling the quilt.
- I added a border when I was finished. This also helps some with getting the fabric to behave itself.
I used a soft 100% cotton batting with low loft, and a fun modern print by Michael Miller for the backing. For the quilting, I wanted to try my hand at a few free-motion styles. I used five different colors of thread, including silk and variegated thread. My machine is happiest with Mettler silk finish 100% cotton, but I was also able to use the silk thread without incident.I marked the quilt with chalk before beginning--simply three wavy lines across the quilt, about where I decided I would switch thread color. The sky area is quilted in ivory in a meandering curls pattern. I did wavy lines for the next two shades, echoing each other and becoming more flat as the approach the bottom.
The last two shades at the bottom of the quilt are in landscape style free-motion, which is a little harder for me than the other styles, but I am pleased with the results.
Friday, January 18, 2008
Large Scale Prints
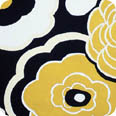
 I finally found a pattern for some large scale Alexander Henry prints I have been collecting. I think I will borrow this design here for my project.
I've been trying to figure out a way to use mostly large scale prints without having the viewer get queasy. You can see my concern in my fabric collection. I'll be sure to post the results as soon as I can get something worth showing!

Tuesday, January 15, 2008
Free quilting patterns

Where is the best place to find free quilting patterns? Please post your links in the comments below. I've found many fabric distributors and supply manufacturers have free patterns on their websites. Here is a summary of my favorites:
- Michael Miller
- Robert Kaufman (scroll about half-way down the page for free patterns)
- Moda (United Notions)
- Bernatex
- Timeless Treasures (check out Solar Flate by Karen Montgomery--it's gorgeous)
- Free Spirit (Westminers Fabrics)
- Carol Doak (well, she doesn't sell fabric, but she does manufacture supplies)
- McCall's Quilting
- Lucy A Fazely (author of Quilt Style)
Please feel free to comment and add your own. Have a wonderful quilting day!
Wednesday, January 9, 2008
Book review: Casting Shadows
Casting Shadows is a great book for beginning quilters who are interested in art quilts or adding dimension to their traditional quilts. Colleen Wise uses plenty of examples in her gallery, which provide the reader for a lot of good reading and inspiration. I can highly recommend this book.
 I'm a beginner, and you can see my attempt at her quilt pattern "Emerald City" here. I've used mostly greens and browns for my quilt, giving it a tranquil, peaceful feeling.
In this book, you'll find five full-color quilt patterns, plus an amazing number of techniques that you can use in hers or your own patterns. She includes a 16-page gallery of quilts that showcase these techniques at the end of the book.
The author begins by discussing how color and value can add dimension in quilt construction. She continues in additional embellishment techniques such as painting, appliqué, discharging and others for adding shadows to the surface of your quilt. While many of her designs and patterns seem complex, the pattern I used took one day to piece completely. She uses many strip-piecing techniques that are great for a beginner like me.
Casting Shadows includes some more complex patterns which include circles and curved piecing. I haven't tried these yet, however. I'll be sure to post them here when I do.
is a great book for beginning quilters who are interested in art quilts or adding dimension to their traditional quilts. Colleen Wise uses plenty of examples in her gallery, which provide the reader for a lot of good reading and inspiration. I can highly recommend this book. I'm a beginner, and you can see my attempt at her quilt pattern "Emerald City" here. I've used mostly greens and browns for my quilt, giving it a tranquil, peaceful feeling.
In this book, you'll find five full-color quilt patterns, plus an amazing number of techniques that you can use in hers or your own patterns. She includes a 16-page gallery of quilts that showcase these techniques at the end of the book.
The author begins by discussing how color and value can add dimension in quilt construction. She continues in additional embellishment techniques such as painting, appliqué, discharging and others for adding shadows to the surface of your quilt. While many of her designs and patterns seem complex, the pattern I used took one day to piece completely. She uses many strip-piecing techniques that are great for a beginner like me.
Casting Shadows includes some more complex patterns which include circles and curved piecing. I haven't tried these yet, however. I'll be sure to post them here when I do.
Subscribe to:
Posts (Atom)